Are you looking for a way to engage your students in the review? If you’re learning how to be a blooket host, you will definitely change everything! Not in an exaggerated manner. In a way that shows students actually pay attention.
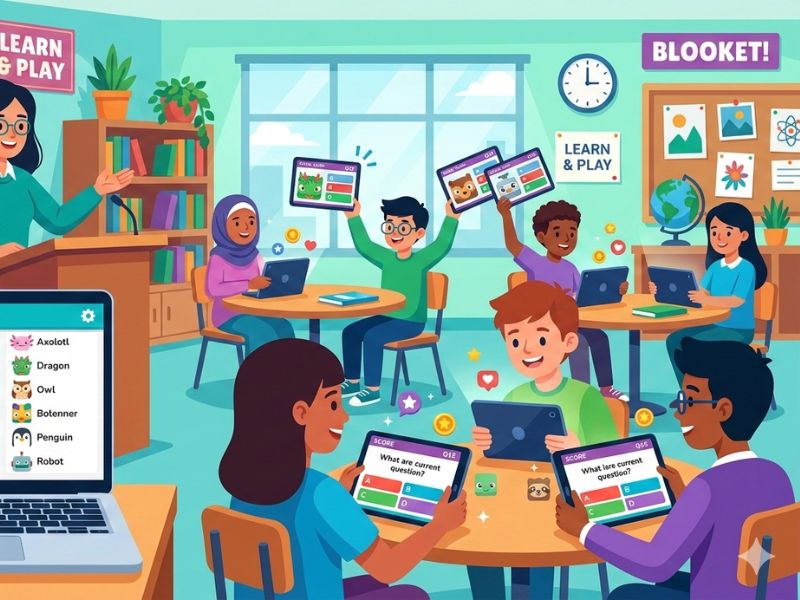
Blooket takes your questions and wraps them around games. Tower defense, gold quests, café themes. Students are competing, thinking, and reviewing content without feeling like they are studying. And you, as the blooket host, are the one making it all happen.
What exactly is Blooket?
Blooket is a free online tool designed for classroom review. Teachers develop question sets or borrow them, select a game mode, and present live. Students join on their own devices and play. Simple as that.
What makes it different from other quiz tools is the game layer on top. Students are not just answering questions. They are trying to steal gold from each other, defend towers, or run a café. The questions are the same. The experience feels completely different.
All teachers use it, no matter their subject or grade. Math, Physics, History, English, ESL. It works for pretty much anything you can turn into a question.
Blooket Login: Setting Up Your Teacher Account
Before you can host blooket sessions, you need an account. Go to Blooket.com and sign up. It’s possible to use a Google account or regular email. It takes roughly 2 minutes.
After your blooket login, you land on your teacher dashboard. This is where everything lives. Your question sets, game history, and reports are all here. Spend five minutes clicking around before your first session. It helps.
The free account gives you access to almost everything you need. There is a paid plan called Blooket Plus, but honestly, most teachers run their entire year on the free version without feeling limited.
Finding or Creating a Question Set
You have two paths here.
Build your own. Click “Create” and start adding questions. Multiple choice, true/false, typed answers. You can also include images, which is excellent for science diagrams or math questions. Ensure that there are at least 15 questions in a set for the game not to feel redundant.
Use someone else’s. The Discover tab has thousands of sets made by other teachers. Use subjects, grades, or keywords to search. Choose the one that fits your lesson out and you’re ready to go! You can also duplicate a set and tweak it to match exactly what your class covered.
As a blooket host, you do not have to start from scratch every time. That is one of the best things about this platform.
How to Host a Blooket Game: Step by Step
This is the part that matters most. Here is exactly how to run a live game.
Open your question set. Find the set you want and click the Host button. This takes you to the game mode selection screen.
Pick a game mode. This is where you make a choice that affects the whole vibe of the session. Gold Quest adds randomness and luck, which helps level the playing field. Tower Defense rewards accuracy and focus. Racing is quick and competitive. Test the waters with some new ideas each week to see what the students respond to best.
Set your preferences. Choose how long the game runs. Ten minutes works well for most review sessions. You can also decide whether to let students join after the game has started.
Launch and share the code. Hit Host Now and Blooket generates a six-digit game code. Put it on your projector or board. Students go to blooket join using that code and they are in the lobby within seconds.
Start the game. Once your students are in, click Start. They play on their devices while you watch the live dashboard.
That is the whole process. The first time you do it feels a little uncertain. By the third time, it takes you under two minutes from start to game.
The Student Side: Blooket Join and Blooket Play
From a student’s point of view, this couldn’t be easier. First they open a browser, go to Blooket.com, then click Join a Game. They enter a code, choose a name, and then they are in.
No account needed. No app to download. Just the code and a browser.
This matters more than people realize. When students have to make accounts or download anything, you lose five minutes minimum. With blooket join, the whole class is in the lobby in under a minute. You spend your time actually teaching instead of troubleshooting logins.
Once the game starts and students begin to blooket play, you will notice something. The room gets quiet in the focused way, not the bored way. They are reading questions carefully because the game depends on it.
Tips That Actually Make a Difference
A few things experienced teachers have learned from running lots of these sessions.
Use the results after the game. The host dashboard shows you exactly which questions students struggled with. That is your next mini-lesson right there. Do not skip this step.
Rotate your game modes. If you use the same one each week, students do get bored with the format, even though the questions are different. Mixing it up keeps things fresh.
Try pair play sometimes. Two students sharing one device and deciding answers together adds a collaborative layer that solo play does not have. Works especially well on harder content.
Keep your question sets updated. Old questions from three units ago mixed into a current review set creates confusion. Keep sets organized by unit or topic.
Do not stress if something goes wrong. The platform occasionally has a glitch or a student’s device disconnects. It happens. Students are forgiving when the game is fun.
Homework and Independent Practice
Being a blooket host is not just for live classroom games. You can assign sets for solo practice too.
Students create their own accounts for this. After blooket login, they find the assigned set and play through it on their own time. You get a report showing completion and scores. It is an enjoyable way of assigning practice that doesn’t feel like a burden since it is in a game format.
This is great for flipped classrooms, test prep week, or just giving students practice on a concept they are struggling with.
Is Blooket Plus Worth Paying For?
Short answer: probably not right away.
The free version covers everything a typical classroom needs. You can host blooket games daily, build unlimited question sets, and access the basic analytics.
Blooket Plus includes deeper reports, other game modes, and some quality-of-life features. If you utilize the platform a lot and want sweeter information on what students are doing, it could be worth it. But start free, see how much you use it, and then decide.
Conclusion
Learning to be a strong blooket host does not take long, but the payoff shows up fast. Students look forward to review days. They ask if you are playing Blooket. That is not something that happens with a worksheet.
Start simple. Pick a question set from the Discover tab, try one game mode, and run your first session. Watch the blooket play energy in your classroom and go from there.
The blooket host tools are built to make your life easier, not complicated. Use them that way.
Frequently Asked Questions
Do students need an account to join?
No. They just need the game code and a browser. The blooket join process takes under a minute with no sign-up required.
Is Blooket free?
Yes. The core platform is completely free. Blooket Plus exists for extra features but is not necessary for most teachers.
How many students can join one game?
Free accounts support up to 60 players per session, which covers the vast majority of classroom sizes.
Can I use it for remote learning?
Yes. Students can blooket play from anywhere with internet access. Works just as well at home as in the classroom.
Can I see individual student results?
Absolutely. After each session, the blooket host dashboard breaks down scores and accuracy question by question for every student.
What if a student misses the live game?
You can assign the same question set for solo play. Students complete it independently after blooket login and you still receive their results.